Use Case: A customer offers several different services, and would like their customers to fill out a brief webform and select the service that they would like. Clicking submit will send them to the appropriate Booking Link.
Needs:
- Booking Links for each service that is being offered
- Infusionsoft Webform
Create the AppointmentCore Booking Links:
1. Customer should create these on their own first
2. Make a list of all of the services offered and the Booking Link suffixes for use in the Infusionsoft webform. This can be found here:

Create an Infusionsoft Webform:
1. Create Infusionsoft webform that contains the fields that the AppointmentCore user wants to gather from the customer (Click here for a tutorial on creating webform)
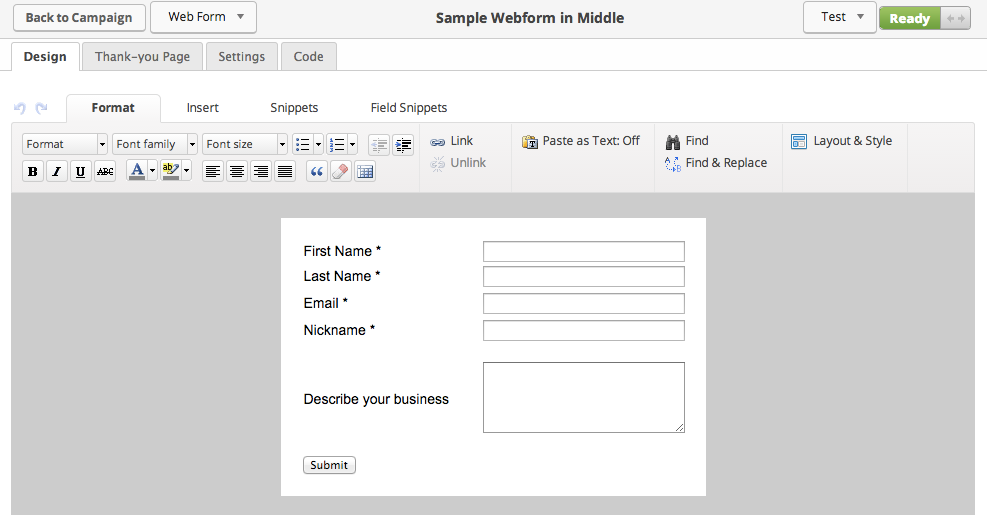
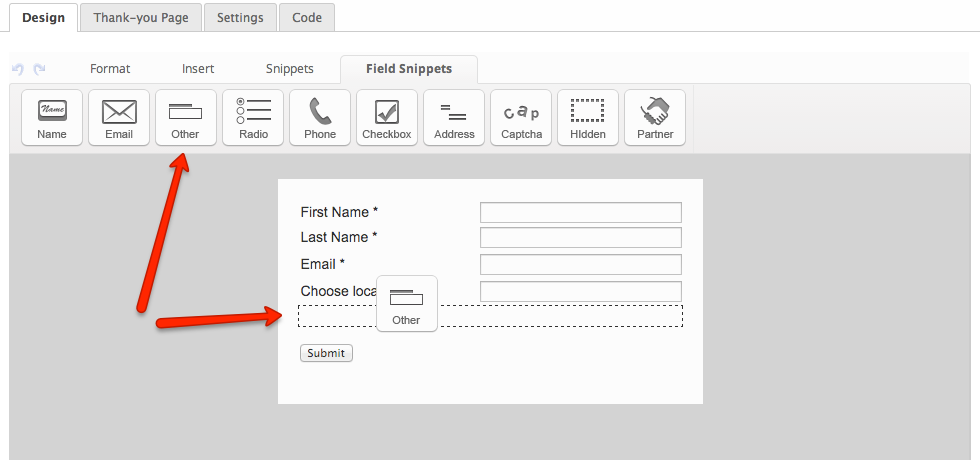
2. Under the Field Snippets tab, click and drag the "Other" snippet onto the webform where you would like to ask your customer to select their service:
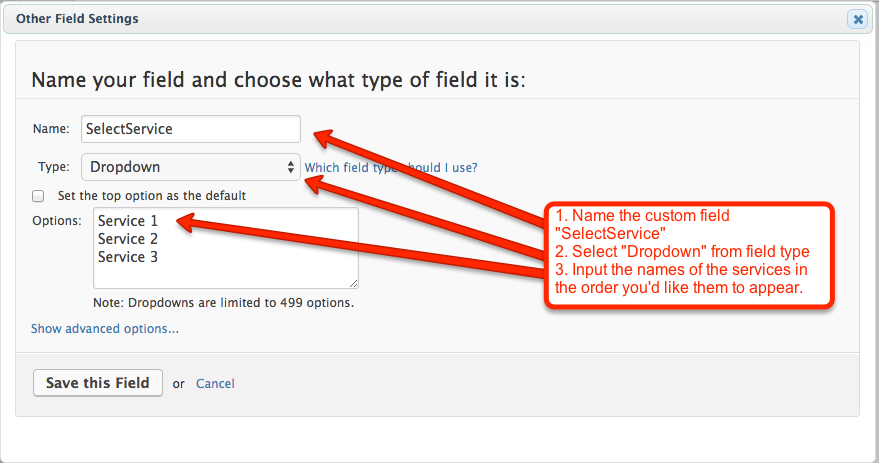
3. Name the custom field "SelectLocation" and choose "Dropdown" from menu type. Under "Options", list the services that the customer offers, in the order that they would like the names to appear. Once you're finished, click "Save this Field" to continue.
4. Next, click on the "Thank-you Page" tab and select "Thank-You Page" from the dropdown menu. The look and format of the Thank-You page will be displayed below; the customer can edit this page on their own, or with your help.
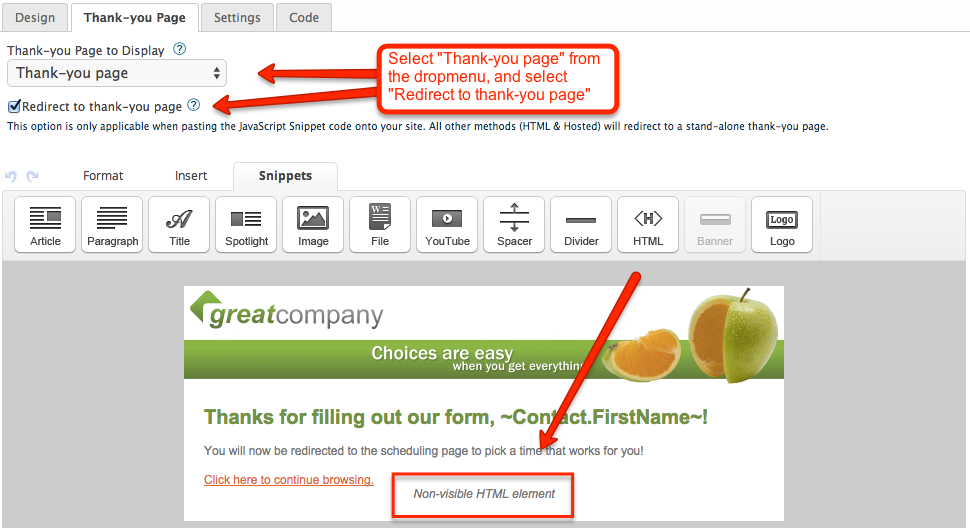
5. Add an HTML Snippet to the webform by clicking and dragging the <HTML> icon from under the "Snippets" tab. Insert the following code snippet, filling in the AppointmentCore Booking Link information where shown:
<script type="text/javascript">
var Store='~Contact._SelectService~';
var urlPrefix = 'http://www.scheduleyou.in/';
var urlSuffix = '?Id=~Contact.Id~';
var url = '';
switch (Store){
case 'Service 1':
url+='ApptCore Booking Link Suffix (for example, iMU6Av)';
break;
case 'Service 2':
url += 'ApptCore Booking Link Suffix';
break;
case 'Service 3':
url+='ApptCore Booking Link Suffix';
break;
} /* end switch */
var urlFinal = urlPrefix + url + urlSuffix;
if (url!=''){
var delay = 0;
setTimeout(function()
{window.location.href = urlFinal;
}, delay);
}
</script>
If you need to add additional services, you can add to this code by including another service:
case 'Service 4':
url+='ApptCore Booking Link Suffix';
break;
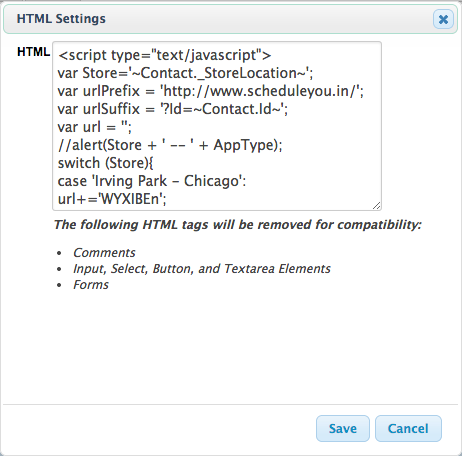
Once you're finished, click save to complete your changes.
6. To activate the form, switch the webform over from "Draft" to "Ready" in the top right corner, then go back to the campaign and click Publish in the top-right corner to save your changes.
7. To test the form, double-click the webform icon in the campaign, then click on "Code". Under "use the hosted version", there will be a link for you to click on. This link can be used in your emails, or the webform can be embedded onto your website.
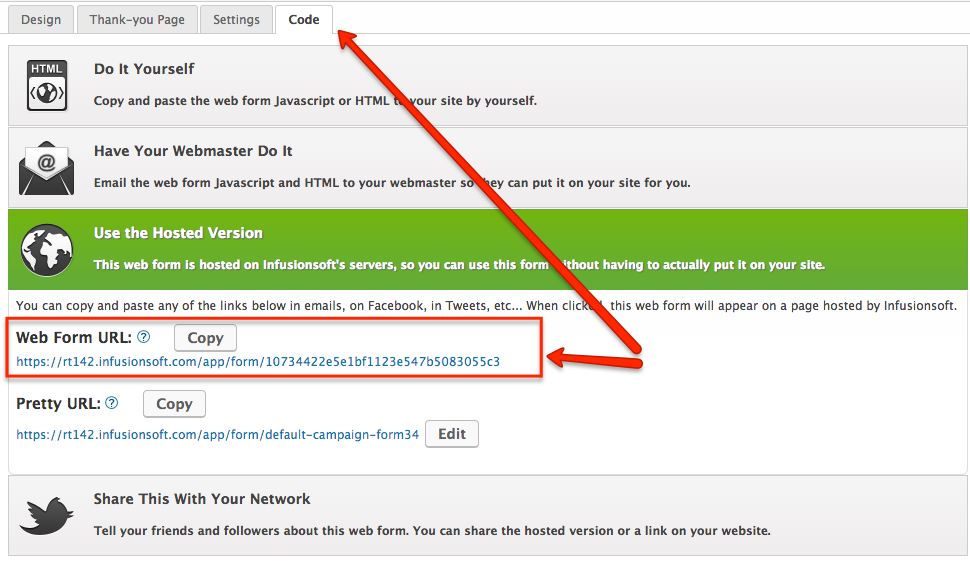
NOTE: Make sure and TEST any webform before providing solution to customer for live use.
Comments